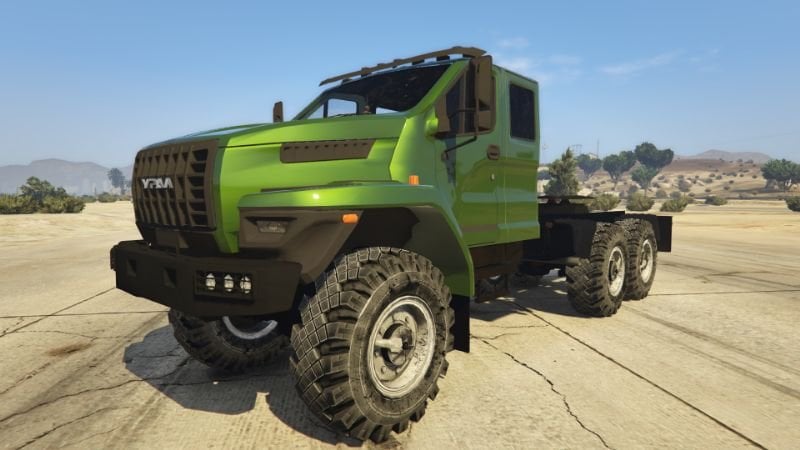
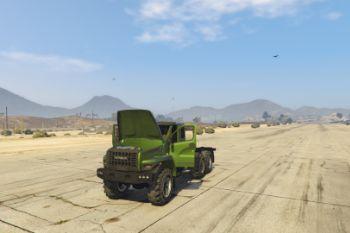
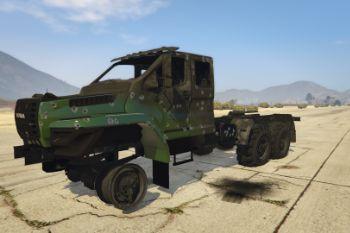
Ural "Next" [Add-On] 2.0
7.044
125
7.044
125
###RUS:###
###Урал«Некст»###
Для работоспособности данного мода,возможно вам потребуется модифицированный gameconfig.xml под вашу версию игры.
Автор модели:Max Dmitriev (Maxim m67)
Автор доработки и конвертации модели: JohnMc
Изменения в v.2.0:
Пофиксил капот-убрал прозрачность.
Удалил игрушку из салона.
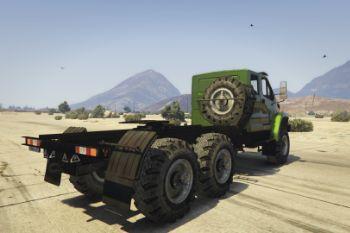
Добавил запаску.
Заменил металлические брызговики.
Установка:
Откройте OpenIV,переключитесь в режим редактирования.
Пройдите по адресу: GTAV\update\update.rpf\common\data\
Найдите файл "dlclist.xml" и экспортируйте его на рабочий стол,откройте dlclist.xml
блокнотом и вставьте данную строку:
<Item>dlcpacks:\uralnext\</Item>
Закройте и сохраните,далее переместите туда где был данный файл.
Далее пройдите по адресу:GTAV\update\x64\dlcpacks,
создайте там папку с названием "uralnext",откройте её и перенесите в неё файл "dlc.rpf"
Сделано!
Спавнить транспорт в игре с помощью трейнера по наименованию: "urnext"
###ENG:###
###Ural«Next»###
For the health of mods, you will need gameconfig.xml for your version of the game.
Model Author: Max Dmitriev (Maxim m67)
The author of fixed and conversion of the model for GTA V: JohnMc
Changes in v.2.0:
Finished the bonnet, patched the transparency.
Removed the toy from the cabin.
Added a spare wheel.
Replaced the metal mud flaps.
Installing:
Open OpenIV, switch to edit mode.
Go to the address: GTAV \ update \ update.rpf \ common \ data \
Locate the file "dlclist.xml" and export it to the desktop, open dlclist.xml
notepad and paste this line:
<Item>dlcpacks:\uralnext\</Item>
Next, go to the address: GTAV \ update \ x64 \ dlcpacks,
create there a folder called "uralnext", open it and drag it into the file "dlc.rpf"
Done!
Spawn a car in the game using the Trainer for the title:"urnext"
First Uploaded: Mércores 19 de Abril de 2017
Last Updated: Xoves 20 de Abril de 2017
Last Downloaded: 16 horas
46 Comments
More mods by JohnMc:
###RUS:###
###Урал«Некст»###
Для работоспособности данного мода,возможно вам потребуется модифицированный gameconfig.xml под вашу версию игры.
Автор модели:Max Dmitriev (Maxim m67)
Автор доработки и конвертации модели: JohnMc
Изменения в v.2.0:
Пофиксил капот-убрал прозрачность.
Удалил игрушку из салона.
Добавил запаску.
Заменил металлические брызговики.
Установка:
Откройте OpenIV,переключитесь в режим редактирования.
Пройдите по адресу: GTAV\update\update.rpf\common\data\
Найдите файл "dlclist.xml" и экспортируйте его на рабочий стол,откройте dlclist.xml
блокнотом и вставьте данную строку:
<Item>dlcpacks:\uralnext\</Item>
Закройте и сохраните,далее переместите туда где был данный файл.
Далее пройдите по адресу:GTAV\update\x64\dlcpacks,
создайте там папку с названием "uralnext",откройте её и перенесите в неё файл "dlc.rpf"
Сделано!
Спавнить транспорт в игре с помощью трейнера по наименованию: "urnext"
###ENG:###
###Ural«Next»###
For the health of mods, you will need gameconfig.xml for your version of the game.
Model Author: Max Dmitriev (Maxim m67)
The author of fixed and conversion of the model for GTA V: JohnMc
Changes in v.2.0:
Finished the bonnet, patched the transparency.
Removed the toy from the cabin.
Added a spare wheel.
Replaced the metal mud flaps.
Installing:
Open OpenIV, switch to edit mode.
Go to the address: GTAV \ update \ update.rpf \ common \ data \
Locate the file "dlclist.xml" and export it to the desktop, open dlclist.xml
notepad and paste this line:
<Item>dlcpacks:\uralnext\</Item>
Next, go to the address: GTAV \ update \ x64 \ dlcpacks,
create there a folder called "uralnext", open it and drag it into the file "dlc.rpf"
Done!
Spawn a car in the game using the Trainer for the title:"urnext"
###Урал«Некст»###
Для работоспособности данного мода,возможно вам потребуется модифицированный gameconfig.xml под вашу версию игры.
Автор модели:Max Dmitriev (Maxim m67)
Автор доработки и конвертации модели: JohnMc
Изменения в v.2.0:
Пофиксил капот-убрал прозрачность.
Удалил игрушку из салона.
Добавил запаску.
Заменил металлические брызговики.
Установка:
Откройте OpenIV,переключитесь в режим редактирования.
Пройдите по адресу: GTAV\update\update.rpf\common\data\
Найдите файл "dlclist.xml" и экспортируйте его на рабочий стол,откройте dlclist.xml
блокнотом и вставьте данную строку:
<Item>dlcpacks:\uralnext\</Item>
Закройте и сохраните,далее переместите туда где был данный файл.
Далее пройдите по адресу:GTAV\update\x64\dlcpacks,
создайте там папку с названием "uralnext",откройте её и перенесите в неё файл "dlc.rpf"
Сделано!
Спавнить транспорт в игре с помощью трейнера по наименованию: "urnext"
###ENG:###
###Ural«Next»###
For the health of mods, you will need gameconfig.xml for your version of the game.
Model Author: Max Dmitriev (Maxim m67)
The author of fixed and conversion of the model for GTA V: JohnMc
Changes in v.2.0:
Finished the bonnet, patched the transparency.
Removed the toy from the cabin.
Added a spare wheel.
Replaced the metal mud flaps.
Installing:
Open OpenIV, switch to edit mode.
Go to the address: GTAV \ update \ update.rpf \ common \ data \
Locate the file "dlclist.xml" and export it to the desktop, open dlclist.xml
notepad and paste this line:
<Item>dlcpacks:\uralnext\</Item>
Next, go to the address: GTAV \ update \ x64 \ dlcpacks,
create there a folder called "uralnext", open it and drag it into the file "dlc.rpf"
Done!
Spawn a car in the game using the Trainer for the title:"urnext"
First Uploaded: Mércores 19 de Abril de 2017
Last Updated: Xoves 20 de Abril de 2017
Last Downloaded: 16 horas
![HMMWV M966 [Add-On] HMMWV M966 [Add-On]](https://img.gta5-mods.com/q75-w500-h333-cfill/images/hmmwv-add-on/3dd988-GTA5 2017-02-27 21-13-51-029.jpg)
![Ka-60 [Add-On] Ka-60 [Add-On]](https://img.gta5-mods.com/q75-w500-h333-cfill/images/ka-60-add-on/1ec269-1.jpg)
![KrAZ 2-in-1 [Add-On] KrAZ 2-in-1 [Add-On]](https://img.gta5-mods.com/q75-w500-h333-cfill/images/kraz-2-in-1-add-on/f5df9c-GTA5 2017-04-11 23-00-48-031.jpg)


 5mods on Discord
@hi2142 In the process, the textures of the interior are not, only the shell and wheels
@JohnMc The exterior is already excellent for me, job well done to both vehicles, looking forward for updates; downloading ^_^
@JohnMc посмотрел тт-4. Не получитса сделать в гта 5 у тебя моды офигитильные просто спрашиваю
Not working, I think something got lost in the google translator that you used or something. Followed all the instructions perfectly. For one thing, you kept switching between "urnext" and "uralnext" notice the "L" in the second word. I think that's why it's not working. In the trainer I typed both without any luck :(
Nevermind I got it working sorry
Awesome truck!
This is the most beautiful i ever see in gta score 6/5
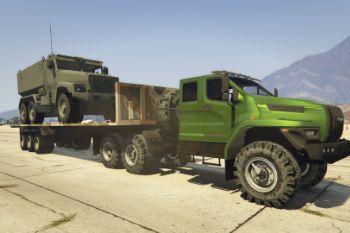
@JohnMc Are the flatbed trailers and the vehicles on top of them included?
@JohnMc Where did you get the truck on the flatbed trailer in the 5th image?
@EvilDIE Correct installation in the description here! Spawn truck URNEXT.
i install it but it's crashing my game
@JohnMc what's the truck in the trailer? https://img.gta5-mods.com/q75-w350-h233-cfill/images/ural-next-add-on/25a6f4-GTA5%202017-04-20%2016-29-17-060.jpg
@neogeo39 Hi. This is a military transport from Russia, it is called Typhoon.
@JohnMc do you have the link to download it? I can't find it anywhere
@neogeo39 https://clck.ru/Gbvfx
On fivem If you walk near to this truck it crashes the game. Completely repeatable. No I haven't installed it wrong(converted hundreds of cars with no problem). Sad as the truck is awesome otherwise.
Nice.
is it possible to get number plates on this?
Replace? pls?
РЕСПЕКТ ЗА МОД! THANK YOU VERY MUCH!